Introduction
This article describes how to integrate your Azure IoT Hub with Connectware. It will help you configure the necessary Connectware service commissioning file and provide examples of mapping data from Connectware to Azure IoT Hub and vice versa. In addition, the article links to helpful tools to help you work with Azure IoT Hub and implement your use cases faster.
Objectives
- Establishing a connection between Connectware and Azure IoT Hub.
- Setting up a read endpoint for Azure IoT Hub.
- Setting up a write endpoint for Azure IoT Hub.
- Providing resources for Connectware and Azure IoT Hub use case implementation.
Prerequisites
- Access to a configured Azure IoT Hub.
- Access to a Connectware instance.
- Knowledge of Connectware and its service concept. For a quick introduction, we recommend that you read the articles Connectware Technical Overview and Service Basics.
- Knowledge of MQTT and how to publish data to an MQTT topic. For a quick introduction, we recommend that you read the articles MQTT Basics and How to connect an MQTT client to publish and subscribe data.
Connectware & Azure IoT Hub Integration
As described in the official Azure documentation, Azure IoT Hub supports communication via MQTT. There are two ways to communicate with the IoT Hub device endpoints:
- MQTT v3.1.1 on TCP port 8883
- MQTT v3.1.1 via WebSocket on TCP port 443
In this article, we will focus on connecting via TCP port 8883, which is the standard secure communication port for MQTT and is the preferred integration of Azure IoT Hub with Connectware.
Azure IoT Hub Connection Properties
To access Azure IoT Hub, we need some connection properties that we add as definitions (i.e. constant values) to our commissioning file.
For now, do not worry about copying the commissioning file snippets together into one, we provide you with a link to the complete example file at the end.
- iotHubHostname: Requires the full CName of your Azure IoT Hub instance.
- mqttPort: Defaults to port 8883.
- deviceId: Requires the Azure IoT Hub device ID to which you want to send and receive data.
- sasToken: Your SAS token. Refer to the Azure documentation to learn how to retrieve a token for your device.
definitions:

  iotHubHostname: <full CName of your Azure IoT Hub>
  mqttPort: 8883
  deviceId: <Your deviceID>
  sasToken: <Your generated SAS Token>
Code-Sprache: YAML (yaml)
Azure IoT Hub Connection
To connect to Azure IoT Hub, we set up a Cybus::Connection resource in the resources section. The connection uses the general MQTT connector from Connectware. For an overview of the connection properties, refer to MQTT (Cybus documentation).
With the !ref tag we reference the definitions from our previous step. The username is a string composed of the iotHubHostname and the deviceId, to concatenate strings we need the !sub tag. With this tag in place, we can include the definitions within the string by enclosing them in curly brackets and a preceding $.
resources:
  mqttConnection:
    type: Cybus::Connection
    properties:
      protocol: Mqtt
      connection:
        host: !ref iotHubHostname
        port: !ref mqttPort
        username: !sub "${iotHubHostname}/${deviceId}/?api-version=2021-04-12"
        password: !ref sasToken
        clientId: !ref deviceId
        scheme: tls
        keepalive: 3600
Code-Sprache: YAML (yaml)
This is all we need to establish the initial connection to Azure IoT Hub. Now let’s define our read endpoint.
If the Connectware host system does not have access to root CAs, you may need to add the Azure root certificate to your configuration using the caCert property. For more information on Azure root certificates, refer to the Azure documentation.
Writing Data to Azure IoT Hub
You can connect to a specific endpoint on Azure IoT Hub. To write data from Connectware to Azure IoT Hub, the topic is defined by Azure IoT Hub. For more information on this, refer to the Azure documentation.
  # Device to Cloud
  d2cEndpoint:
    type: Cybus::Endpoint
    properties:
      protocol: Mqtt
      connection: !ref mqttConnection
      topic: d2cEndpoint
      qos: 0
      write:
        topic: !sub "devices/${deviceId}/messages/events/"
Code-Sprache: YAML (yaml)
Reading Data from Azure IoT Hub
To read data from Azure IoT Hub, we need another endpoint. In this case, we subscribe to a wildcard topic to receive all data for the device ID we are connected to. Note that this topic is already defined by Azure IoT Hub.
  # Cloud to Device
  c2dEndpoint:
    type: Cybus::Endpoint
    properties:
      protocol: Mqtt
      connection: !ref mqttConnection
      topic: c2dEndpoint
      subscribe:
        topic: !sub "devices/${deviceId}/messages/devicebound/#"
Code-Sprache: YAML (yaml)
Example Mappings for Azure IoT Integration
Here are two example mappings that route topics from Connectware to the endpoints we configured before. Replace the topic Azure/IoTHub/Write with the topic where you want to publish the data to be sent to Azure IoT Hub. In the second mapping, replace Azure/IoTHub/Read with the topic where you want to access the data that comes from Azure IoT Hub.
  deviceToCloudMapping:
    type: Cybus::Mapping
    properties:
      mappings:
        - subscribe:
            topic: Azure/IoTHub/Write
          publish:
            endpoint: !ref d2cEndpoint

  cloudToDeviceMapping:
    type: Cybus::Mapping
    properties:
      mappings:
        - subscribe:
            endpoint: !ref c2dEndpoint
          publish:
            topic: Azure/IoTHub/Read
Code-Sprache: YAML (yaml)
Tools for Use Case Implementation with Azure IoT Hub
There are some helpful tools that are suitable for prototyping or exploring the data on your Azure IoT Hub within Visual Studio Code. These tools should help you to implement your use cases faster.
Connectware Workbench
The Workbench service that comes with Connectware is a Node-RED instance that runs securely inside Connectware as a service. This allows you to install any Node-RED nodes within the service container for quick prototyping.
Important: We do not recommend using Node-RED in production instances as we cannot guarantee reliability. This should only be considered as a rapid-prototyping tool.
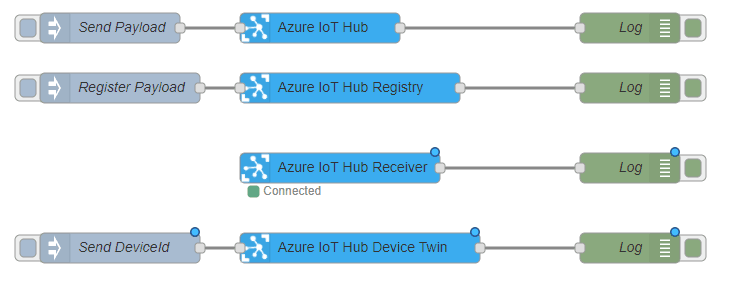
node-red-contrib-azure-iot-hub is a Node-RED module that allows you to send messages and register devices with Azure IoT Hub. It includes a total of four Node-RED cloud nodes: Azure IoT Hub, Azure IoT Registry, Azure IoT Hub Receiver, and Azure IoT Hub Device Twin. For more information on the module, refer to Node-Red.
Azure IoT Tools for Visual Studio Code
Azure IoT Tools is a collection of Visual Studio Code extensions for working with Azure IoT Hub. With these extensions, you can interact with an Azure IoT Hub instance, manage connected devices, and enable distributed tracing for your IoT Hub applications. You can also subscribe to telemetry messages sent to the IoT Hub for quick testing.
For more information on installing and using Azure IoT tools, refer to the Visual Studio Marketplace.
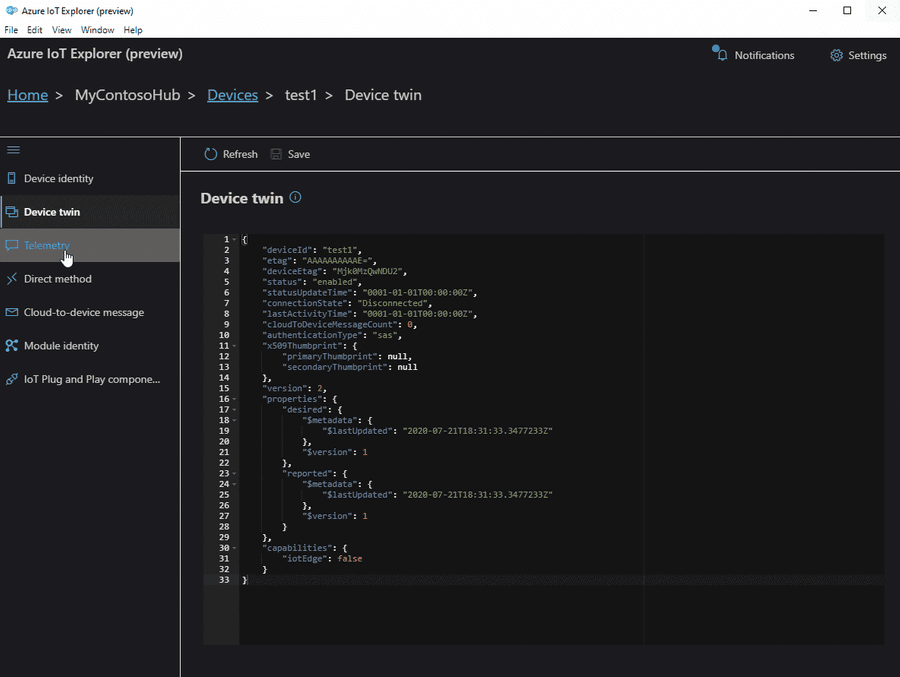
Azure IoT Explorer
Azure IoT Explorer is an open source cross-platform user interface for interacting with Azure IoT Hub without logging into the Azure portal. This tool can be used to perform tasks like creating, deleting, and querying devices within the IoT Hub. Device functions such as sending and receiving telemetry, and editing device and module twin configuration are also possible with this tool.
For more information on Azure IoT Explorer, refer to GitHub.