Troubleshooting Connectware on Kubernetes
Checking Pod state
As with any workload in Kubernetes, Connectware needs to have all its pods in the STATUS Running and with all containers READY. You can see this by them showing the same number left and right of the / when running kubectl get pods on your Connectware installation’s namespace:
$ kubectl get pods
Code-Sprache: YAML (yaml)| NAME | READY | STATUS | RESTARTS | AGE |
|---|---|---|---|---|
| admin-web-app-8649f98fc6-sktb7 | 1/1 | Running | 0 | 3m1s |
| auth-server-5f46964984-5rwvc | 1/1 | Running | 0 | 2m39s |
| broker-0 | 1/1 | Running | 0 | 2m11s |
| broker-1 | 1/1 | Running | 0 | 2m50s |
| connectware-5b948ffdff-tj2x9 | 1/1 | Running | 0 | 2m41s |
| container-manager-5f5678657c-94486 | 1/1 | Running | 0 | 2m46s |
| control-plane-broker-0 | 1/1 | Running | 0 | 2m4s |
| control-plane-broker-1 | 1/1 | Running | 0 | 2m48s |
| doc-server-6b486bb5cb-fkpdb | 1/1 | Running | 0 | 3m |
| ingress-controller-85fffdcb4b-m8kpm | 1/1 | Running | 0 | 2m37s |
| postgresql-0 | 1/1 | Running | 0 | 2m58s |
| protocol-mapper-69f59f7dd4-6xhkf | 1/1 | Running | 0 | 2m42s |
| service-manager-6b5fffd66d-gt584 | 1/1 | Running | 0 | 2m52s |
| system-control-server-bd486f5bd-2mkxz | 1/1 | Running | 0 | 2m45s |
| welder-robots-0 | 1/1 | Running | 0 | 2m59s |
| workbench-57d4b59fbb-gqwnb | 1/1 | Running | 0 | 2m38s |
You can identify an unhealthy pod by it displaying a clear error state, or by being stuck in a transitory state for too long, for example this pod is unable to start:
| NAME | READY | STATUS | RESTARTS | AGE |
|---|---|---|---|---|
| auth-server-b4b69ccfd-fvsmz | 0/1 | Init:0/1 | 0 | 8m |
To see the reason for a pods problem you need to use the kubectl describe pod <podname> command and then check the events section at the bottom of the output. In this case the pod wants to use a volume that the Kubernetes cluster cannot provide:
Warning  FailedMount  7m4s kubelet Unable to attach or mount volumes: unmounted volumes=[testfail], unattached volumes=[certs testfail kube-api-access-52xmc]: timed out waiting for the condition
Code-Sprache: YAML (yaml)
To repair a situation like this you need to resolve the underlying issue, which can be a wide array of things that are beyond the scope of the Connectware documentation, and are generally covered by Kubernetes documentation.
If there is no clear reason visible for a problem you should check the logs next, which might give you an indicator of the problem. Checking the logs is covered in the next section.
It is generally a good rule of thumb that issues that exist right after an upgrade or reconfiguration of Connectware are often related to misconfiguration within the Helm values, while problems that start and persist later are connected to cluster infrastructure.
Should you be unable to identify or fix the root cause you might have to involve your support contact.
Checking logs using kubetail
We recommend using the tool kubetail to easily follow logs of multiple pods (https://github.com/johanhaleby/kubetail).
This tool is a small wrapper around kubectl that allows you to see multiple logs at the same time. If you want to use kubetail please follow the instructions on the project’s Github page to install it. By default kubetail will always follow the logs like kubectl logs -f would.
Here are a few examples of how you can use it, but make sure to check kubetail --help too:
Display the logs of a whole namespace
kubetail -n <namespace>
Code-Sprache: YAML (yaml)
Display logs of pods that match a search term
kubetail broker
Code-Sprache: YAML (yaml)
Display logs for pods that match a regular expression
kubetail '(service-manager|protocol-mapper)' -e regex
Code-Sprache: YAML (yaml)
Display logs from the past
You can combine the parameter -s <timeframe> with any other command to display logs from the past up to now:
kubetail broker -s 10m
Code-Sprache: YAML (yaml)
Display logs of a terminated container of a pod
kubetail broker --previous
Code-Sprache: YAML (yaml)
Displaying timestamps
If the logs you are viewing a missing timestamps you can use the parameter --timestamps for kubetail to add timestamps to each log line:
kubetail broker --timestamps
Code-Sprache: YAML (yaml)
Checking logs using kubectl
If you don’t want to use kubetail as suggested in the previous chapter, you can use kubectl to read logs.
Here are a few examples of how you can use it:
Display and tail the logs of a pod
kubectl logs -f <podname>
Code-Sprache: YAML (yaml)
Display and tail logs for all pods with a label
kubectl logs -f -l app=broker
Code-Sprache: YAML (yaml)
Display logs of a terminated container of a pod
kubectl logs --previous <podname>
Code-Sprache: YAML (yaml)
Display logs from the past
You can combine the parameter –since <timeframe> with any other command to display logs from the past up to now:
kubectl logs -f --since 10m <podname>
Code-Sprache: YAML (yaml)
Displaying timestamps
If the logs you are viewing a missing timestamps you can use the parameter –timestamps for kubectl to add timestamps to each log line:
kubectl logs -f --timestamps <podname>
Code-Sprache: YAML (yaml)
Removing unhealthy pods
When a pod is in an unhealthy state as covered by the section Checking Pod state or identified through viewing of the logs it is often a good first step to collect the current state into an archive using our collect_debug.sh script from the Connectware Kubernetes Toolkit covered in the section Collecting Debug Information.
Following that you should simply remove this pod using the kubectl delete pod <podname> command. This will cause the owning controller of this pod to create a new instance, which often already solves many issues. Do not be afraid to delete pods when they are unhealthy, as this does not delete any persisted data.
Pay special attention to any pod that does not contain a randomly generated id, but ends in a simple number, for example broker-0. These pods are part of a StatefulSet, which often is treated differently by Kubernetes than most workloads. One of the differences is that an unhealthy pod is not replaced by a newer version automatically, which means you cannot fix a configuration mistake on a StatefulSet without manually deleting the pod. This behavior is meant to protect StatefulSets from automatic processes as they often contain workloads that handle stateful data.
For Connectware StatefulSets include the broker, control-plane-broker, postgresql, and any protocol-mapper agents you defined.
Restarting Connectware
In order to restart Connectware completely you will need to scale all Controller resources to 0 before scaling them back up.
The following guides explain how to do this for different versions of Connectware. Please read the guides carefully to avoid accidentally impacting other workloads on your cluster.
Any Connectware Version
This procedure is meant to work for any version of Connectware on Kubernetes.
Prerequisites
- kubectl installed and configured to point at the target Kubernetes cluster
- A shell capable of storing variables (e.g. bash)
This procedure will scale everything that is currently deployed in the target namespace!
If you have any workload besides Connectware Core Services in this namespace they will be restarted too!
- Store the namespace that is used for Connectware in a variable:
<code>CONNECTWARE_NS=<namespace here></code>
Code-Sprache: YAML (yaml)- Verify what will be restarted using this procedure:
<code>kubectl get sts,deployment -n $CONNECTWARE_NS</code>
Code-Sprache: YAML (yaml)- If this displays any workload that is not part of the Connectware Core Services you will need to note down their scaling and scale them to their original value after finishing this procedure.
- Store the number of replicas configured for the broker:
<code>BROKER_REPLICAS=$(kubectl get --no-headers -o custom-columns=":spec.replicas" sts broker -n $CONNECTWARE_NS)</code>
Code-Sprache: YAML (yaml)- Optional: If you use the optional control-plane-broker, store the number of replicas configured for the control-plane-broker:
<code>CONTROL_PLANE_REPLICAS=$(kubectl get --no-headers -o custom-columns=":spec.replicas" sts control-plane-broker -n $CONNECTWARE_NS)</code>
Code-Sprache: YAML (yaml)- Scale down all StatefulSets and Deployments:
<code>kubectl get deploy,sts -n $CONNECTWARE_NS -o name | xargs -I % kubectl scale -n $CONNECTWARE_NS % --replicas 0</code>
Code-Sprache: YAML (yaml)- Wait for all pods to be terminated, you can monitor this progress with this command (terminate with Ctrl+C when no more pods are showing):
<code>while [ True ]; do clear; kubectl get pod -n $CONNECTWARE_NS ; sleep 5; done</code>
Code-Sprache: YAML (yaml)- Scale up all workloads to 1:
<code>kubectl get deploy,sts -n $CONNECTWARE_NS -o name | xargs -I % kubectl scale -n $CONNECTWARE_NS % --replicas 1</code>
Code-Sprache: YAML (yaml)- Scale broker to the number of replicas recorded earlier:
<code>kubectl -n $CONNECTWARE_NS scale sts broker --replicas $BROKER_REPLICAS</code>
Code-Sprache: YAML (yaml)- Optional: If you use the optional control-plane-broker, scale control-plane-broker to the number of replicas recorded earlier:
<code>kubectl -n $CONNECTWARE_NS scale sts control-plane-broker --replicas $CONTROL_PLANE_REPLICAS</code>
Code-Sprache: YAML (yaml)- Monitor pods and verify all reach the Running status and report ready n/n:
<code>while [ True ]; do clear; kubectl get pod -n $CONNECTWARE_NS ; sleep 5; done</code>
Code-Sprache: YAML (yaml)- Optional: Scale any additional workloads in this namespace to the value you noted down earlier
Collecting Debug Information
The Connectware Kubernetes Toolkit includes a script named collect_debug.sh which should be used to collect debug information of Connectware’s current state whenever a problem is identified. It is highly recommended to run this tool prior to any attempts to fix a problem.
Prerequisites
- Installed the following tools: kubectl, tar, sed, rm, and sort
- Access to the target installation using kubectl
Download the collect_debug.sh script
You can download the script from https://download.cybus.io/connectware-k8s-toolkit/latest/collect_debug.sh.
Example:
wget
https://download.cybus.io/connectware-k8s-toolkit/latest/collect_debug.sh
chmod u+x ./collect_debug.sh
Code-Sprache: YAML (yaml)
Running the collect_debug.sh script
The script takes parameters to target the correct Kubernetes namespace holding a Connectware installation:
| Parameter | Value | Description |
|---|---|---|
| -n | namespace | The Kubernetes namespace to use |
| -k | path to kubeconfig file | A kubeconfig file to use other than the default (~/.kube/config) |
| -c | name of kubeconfig context | The name of a kubeconfig context different than the currently selected |
If your kubectl command is already configured to point at the correct cluster you can use the script by just specifying the namespace:
./collect_debug.sh -n <namespace>
Code-Sprache: YAML (yaml)
The script will collect logs and state information and create a compressed Tar archive that you can easily archive and send to your support contact.
If you are collecting pod logs in a central log aggregator, please also include these logs for the relevant timeframe.
Common Problems
This section covers commonly occurring problems that often come from small mistakes in the configuration.
Protocol-Mapper Agents
Problems related to the usage of Protocol-Mapper agents:
| Symptom | Caused by | Solution |
|---|---|---|
| Agent with mTLS enabled not connecting to broker Agent log shows Reconnecting to mqtts://connectware:8883Broker log shows: [warning] can't authenticate client {"ssl",<<"someName">>} from someIp due to <<"Authentication denied">> | mTLS not enabled in Connectware | Enable mTLS in Connectware as described in Using Mutual Transport Layer Security (mTLS) for agents with the connectware-agent Helm chart. |
| Agent not connecting to broker when mTLS in Connectware is enabled Agent log shows VRPC agent connection to broker lostReconnecting to mqtts://localhost:8883 | mTLS not enabled in agent | Enable mTLS in agent as described in Using Mutual Transport Layer Security (mTLS) for agents with the connectware-agent Helm chart. |
| Agent with mTLS enabled does not connect to broker Agent log shows Error: Client network socket disconnected before secure TLS connection was established | Agent is connecting to the wrong MQTTS port in broker | Verify the parameters mqttPort and mqttDataPort within the agent’s configuration in the protocolMapperAgents section of your Helm values.yaml file are set to the correct ports. If you are not using a modified setup these values are set correctly by default and can be removed from the Helm values. |
| Agent with mTLS enabled does not connect to broker Agent log shows Failed to read certificates during mTLS setup please check the configuration | The certificates provided to the agent are either not found or faulty | Verify that your certificates are generated and configured as described in Using Mutual Transport Layer Security (mTLS) for agents with the connectware-agent Helm chart. One common mistake is to not generate the Kubernetes objects from files with the names ca-chain.pem, tls.crt and tls.key, however these names will be adopted in the Kubernetes objects and subsequently not be found by the agent. |
Allowing an mTLS enabled agent in Connectware Client Registry fails with the message “An Error has occurred – Registration failed”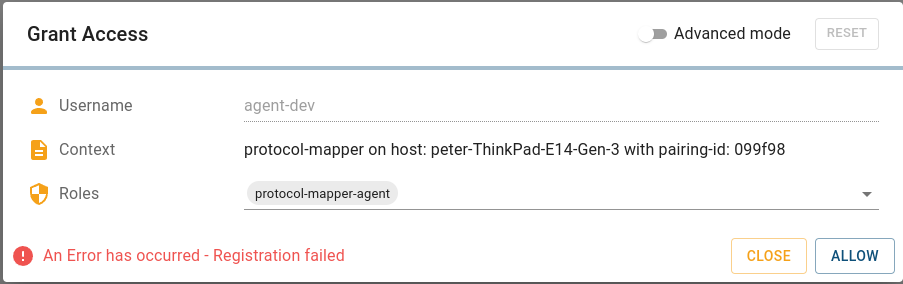 auth-server logs show: Unable to process request: 'POST /api/client-registry/confirm', because: Certificate Common Name does not match the username. CN: someCN, username: agentName | Certificate invalid | Verify the certificate’s Common Name (CN) is identical to the name you configured in the Helm value name for this agent. |
| Agent with mTLS enabled does not connect to broker Agent log shows Can not register protocol-mapper agent, because: socket hang up | Certificate invalid | Verify the agent’s certificate was signed by the correct Certificate Authority (CA). |
| Agent with mTLS enabled does not connect to broker Agent log shows Failed to register agent. Response: 409 Conflict. A conflicting registration might be pending, or a user with the same username <agent-name> is already existing (which you must delete first). | The username of this agent is already taken | Every agent needs a user with the username of the value configured in the Helm value name for this agent. Verify that the agent’s name is unique Verify there is no old agent with the same name, if there is: – Delete the Agent using the Systems => Agents UI – Delete the user using the User Management => Users and Roles UI If you created a user with the agent’s name for something else you have to choose a different name for the agent |
| Agent pod enters state CrashLoopBackOff Agent log shows: {"level":30,"time":1670940068658,"pid":8,"hostname":"welder-robots-0","service":"protocol-mapper","msg":"Re-starting using cached credentials"} | The agents credentials are not correct anymore | The agent needs to be re-registered: Delete the Agent using the Systems => Agents UI Delete the user using the User Management => Users and Roles UI Delete the agents StatefulSet: kubectl -n <namespace> delete sts <agent-name>Delete the agents PersistentVolumeClaim: kubectl -n <namespace> delete pvc protocol-mapper-<agent-name>-0Re-apply your configuration through helm upgrade as described in Applying Helm configuration changes. |
Need more help?
Can’t find the answer you’re looking for?
Don’t worry, we’re here to help.