


Upgrade Connectware from 1.x to 1.5 (Docker Guide)
This Cybus Docker guide provides a detailed procedure to help admins adjust the persistent volume content permissions to ensure a smooth upgrade to Connectware 1.5.0 in Docker Compose environments.
Important: Connectware 1.5.0 introduces a significant change regarding container privileges. Now, containers are started without root privileges. This change causes an issue where files that persisted on volumes that were created by a user other than the one accessing them, cannot easily have their permissions changed. As a result, this upgrade requires the admin to manually update the permissions.
Attention: The following protocols may not operate as expected in some constellations:
- Profinet
- Hottinger Baldwin Messtechnik (HBM)
- OPC DA
If you experience problems with these protocols after upgrading to Connectware 1.5.0 (or higher), these affected services may require root permissions and are no longer supported by the internal protocol-mapper or agents without root permissions.
In this case, you should transfer the service that uses these protocols to a separate agent. This agent can have higher permissions but in a controlled manner.
To learn how to configure an agent to run with root permissions, see the section on agent orchestration.
Upgrading Procedure
As an additional step to this upgrade, we provide a docker-compose.override.yml file to help you configure volume permissions.
The upgrade procedure consists of the following steps:
- Shut down Connectware.
- Save the provided file as
docker-compose.override.ymlin the same folder as your Connectwaredocker-compose.yml. - Start the the Docker composition to adjust the volume permissions.
- Remove the
docker-compose.override.ymlfile. - Upgrade Connectware using the
connectware-online-installer.shscript.
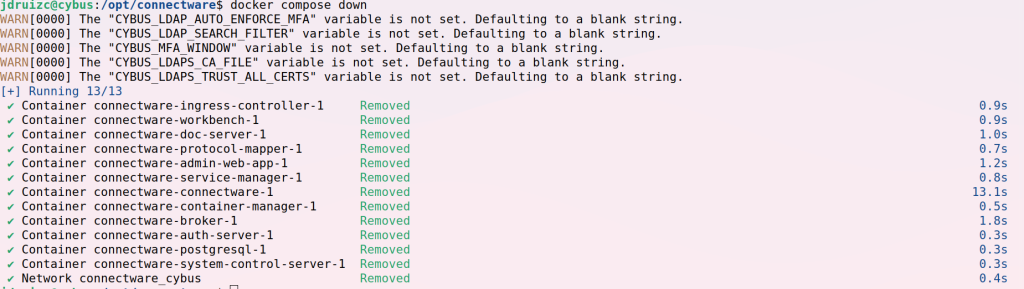
1. Shutting Down Connectware
- In your installation folder (by default
/opt/connectware), rundocker compose down. - Run the command as you normally would. Either as a regular user using
sudoor directly as the userroot.
All containers should be stopped and removed:
2. Downloading and Saving the Override File
- Create a new YAML file in the Connectware installation folder and name it
docker-compose.override.ymlwith the following content:
version: "2.0"
services:
  connectware-fix-permissions:
    user: root
    image: registry.cybus.io/cybus/connectware-fix-permissions:1.5.0
    volumes:
      - certs:/mnt/connectware_certs
      - brokerLog:/mnt/connectware_brokerLog
      - brokerData:/mnt/connectware_brokerData
      - postgresql:/mnt/connectware_postgresql
      - service-manager:/mnt/connectware_service-manager
      - systemControlServerData:/mnt/connectware_systemControlServerData
      - workbench:/mnt/connectware_workbench
  admin-web-app:
    profiles:
    - do-not-start
  auth-server:
    profiles:
    - do-not-start
  broker:
    profiles:
    - do-not-start
  connectware:
    profiles:
    - do-not-start
  container-manager:
    profiles:
    - do-not-start
  doc-server:
    profiles:
    - do-not-start
  ingress-controller:
    profiles:
    - do-not-start
  postgresql:
    profiles:
    - do-not-start
  protocol-mapper:
    profiles:
    - do-not-start
  service-manager:
    profiles:
    - do-not-start
  system-control-server:
    profiles:
    - do-not-start
  workbench:
    profiles:
    - do-not-start
Code-Sprache: YAML (yaml)
Download: upgrade-1-5-docker-compose.override.yml
If you already have a docker-compose.override.yml file for your Connectware installation, make sure to rename it before saving it as docker-compose.override.yml.
3. Adjusting Volume Permissions
- To adjust the volume permissions, run
docker compose up.- Run the command as you normally would. Either as a regular user using
sudoor directly as the userroot.
- Run the command as you normally would. Either as a regular user using
Example output:
[+] Building 0.0s (0/0)
[+] Running 1/0
✔ Container connectware-connectware-fix-permissions-1  Created                              0.0s
Attaching to connectware-connectware-fix-permissions-1
connectware-connectware-fix-permissions-1  | Found directory: connectware_brokerData. Going to change permissions
connectware-connectware-fix-permissions-1  | Found directory: connectware_brokerLog. Going to change permissions
connectware-connectware-fix-permissions-1  | Found directory: connectware_certs. Going to change permissions
connectware-connectware-fix-permissions-1  | Found directory: connectware_postgresql. Going to change permissions
connectware-connectware-fix-permissions-1  | Postgresql volume identified, using postgresql specific permissions
connectware-connectware-fix-permissions-1  | Found directory: connectware_service-manager. Going to change permissions
connectware-connectware-fix-permissions-1  | Found directory: connectware_systemControlServerData. Going to change permissions
connectware-connectware-fix-permissions-1  | Found directory: connectware_workbench. Going to change permissions
connectware-connectware-fix-permissions-1  | All done. Found 7 volumes.
connectware-connectware-fix-permissions-1 exited with code 0
Code-Sprache: YAML (yaml)
4. Removing Override File
- Run
docker compose downto remove the temporary permissions fix container.- Run the command as you normally would. Either as a regular user using
sudoor directly as the userroot.
- Run the command as you normally would. Either as a regular user using
- Next, delete the
docker-compose.override.ymlfile.- If you used a
docker-compose.override.ymlfor your Connectware before this update, restore your original file.
- If you used a
5. Upgrading Connectware
- As of usual for other updates, download and run the Connectware online installer (make sure to change the version to 1.5.0 or higher), allow executable permissions and run the online installer:
wget https://download.cybus.io/1.5.0/connectware-online-installer.sh
chmod +x connectware-online-installer.sh
./connectware-online-installer.sh
Code-Sprache: YAML (yaml)- Run the command as you normally would. Either as a regular user using
sudoor directly as the userroot.
Note: You may need sudo access to install/update Connectware, this is normal, however the new Connectware containers will not have root access once they are running.
After upgrading, you can start Connectware as usual.
Optional: To verify that Connectware services are running with an unprivileged user, you can run this command:
docker ps -qf="label=io.cybus.connectware=core" | xargs -I % docker exec % sh -c 'echo "$(hostname) runs with user ID $(id -u)"'
Code-Sprache: YAML (yaml)
Only the service container-manager should use the user ID 0.
Upgrading Connectware Agents
Connectware agents are ideally orchestrated using docker-compose as described in agent orchestration.
To upgrade your agents, do one of the following:
- Adjust volume permissions to allow unprivileged users to write data (recommended).
- Adjust your Docker composition to continue running with higher privileges.
To benefit from the security improvements, we recommend that you adjust volume permissions rather than continuing to run with elevated privileges.
Important: If you are experiencing problems after upgrading to Connectware 1.5.0 (or higher), the affected services may require root permissions. In such cases, it is advisable to choose to run your agents with elevated privileges (see below).
Upgrading Agents by Adjusting Volumes (Recommended)
Similar to adjusting permissions for the Connectware instance, we provide a docker-compose.override.yml to help you adjust volume permissions.
The upgrade consists of the following steps:
- Shut down the agent.
- Save the provided file as
docker-compose.override.ymlin the same folder as your agent’sdocker-compose.yml. - Start the the Docker composition to adjust volume permissions.
- Remove the
docker-compose.override.ymlfile. - Upgrade the agent by adjusting the image tag in your
docker-compose.ymlfile.
1. Shutting Down the Agent
- Within your agent’s installation folder (NOT the Connectware installation folder), run
docker compose down.- Run the command as you normally would. Either as a regular user using
sudoor directly as the userroot.
- Run the command as you normally would. Either as a regular user using
2. Downloading and Saving the Override File
- In your agent’s installation folder, create a
docker-compose.override.ymlwith the following content:
version: '2.0'
services:
  connectware-fix-permissions:
    user: root
    image: registry.cybus.io/cybus/connectware-fix-permissions:1.5.0
    volumes:
    - protocol-mapper-agent:/mnt/connectware_agent_data
  protocol-mapper-agent:
    profiles:
    - do-not-start
Code-Sprache: YAML (yaml)
Download: upgrade-1-5-agent-docker-compose.override.yml
If you use a different name for your agent Docker service and volume than our example, you need to adjust the name of the agent to your actual agent’s name (lines 7 and 8 of the example above) and its volume in your docker-compose.yml file.
3. Adjusting Volume Permissions
- Run
docker compose up.
Example output:
[+] Building 0.0s (0/0)
[+] Running 2/2
✔ Network agent_default                          Created                                                                                                0.1s
✔ Container agent-connectware-fix-permissions-1  Created                                                                                                0.1s
Attaching to agent-connectware-fix-permissions-1
agent-connectware-fix-permissions-1  | Found directory: connectware_agent_data. Going to change permissions.
agent-connectware-fix-permissions-1  | All done. Found 1 volumes.
agent-connectware-fix-permissions-1 exited with code 0
Code-Sprache: YAML (yaml)
4. Removing the Override File
- Run
docker compose downto remove the temporary permissions fix container.- Run the command as you normally would. Either as a regular user using
sudoor directly as the userroot.
- Run the command as you normally would. Either as a regular user using
- Delete the file
docker-compose.override.yml.- If you used a
docker-compose.override.ymlfor your agent before this update, restore your original file.
- If you used a
5. Upgrading the Agent
- As before, set the image tag used for the agent to the same tag as your current Connectware installation, but at least
1.5.0. If you have not yet upgraded Connectware to at least version1.5.0, do so now.
Example of an agent YAML file for agent running 1.5.0:
version: '2.0'
services:
  protocol-mapper-agent:
    image: registry.cybus.io/cybus/protocol-mapper:1.5.0
    environment:
      CYBUS_AGENT_MODE: distributed
      CYBUS_AGENT_NAME: myAgent
      CYBUS_MQTT_HOST: 172.17.0.1
    volumes:
      - protocol-mapper-agent:/data
    restart: unless-stopped
    network_mode: host
    hostname: myAgent
volumes:
  protocol-mapper-agent:
Code-Sprache: YAML (yaml)
You can now start your agent as usual, for example by running docker compose up -d.
Upgrading by Using Root Privileges
As an alternative to modifying volume permissions, or if you are using a protocol that requires elevated permissions, you can modify your agent’s docker-compose.yml file to specify the user which is used for the container.
- To do so, add
user: rootto the docker compose service of your agent and set the image tag to the same tag that your current Connectware installation uses.
For example (see line 4):
version: '2.0'
services:
  protocol-mapper-agent:
    user: root
    image: registry.cybus.io/cybus/protocol-mapper:1.5.0
    environment:
      CYBUS_AGENT_MODE: distributed
      CYBUS_AGENT_NAME: myAgent
      CYBUS_MQTT_HOST: 172.17.0.1
    volumes:
      - protocol-mapper-agent:/data
    restart: unless-stopped
    network_mode: host
    hostname: myAgent
volumes:
  protocol-mapper-agent:
Code-Sprache: YAML (yaml)- You can now start your agent as usual, for example by running
docker compose up -d. - If you use a
docker runcommand, you can add--user=rootto the command.
Related Articles
Need more help?
Can’t find the answer you’re looking for?
Don’t worry, we’re here to help.