


How to Set Up the Integrated Connectware OPC UA Server
Prerequisites
This lesson assumes that you want to set up an OPC Unified Architecture (a.k.a OPC UA) server as an integrated Connectware resource which other clients can connect to. To understand the basic concepts of the Connectware, please take a look at the Technical Overview lesson.
To follow along with the example, you will need a running instance of the Connectware 1.0.18 or later. In case you do not have that, learn How to install the Connectware.
In this article we will create a Connectware service which configures and enables the OPC UA server. If you are new to services and creating commissioning files, read our article about Service Basics. If you would like to set up the Connectware as an OPC UA client, please view the article How to Connect to an OPC UA Server.
Introduction
This article will teach you how to use the Connectware OPC UA server resource in your system setup. In more detail, the following topics are covered:
- Including the server definition in your commissioning file
- Defining nodes and mappings
- Starting up the OPC UA server
- Using an external OPC UA client to connect to the server
Service Commissioning File Example
You can download the service commissioning file that we use in this example from the Cybus GitHub repository.
Selecting the Tools
We will use Prosys OPC UA Client for testing in this guide. However, it is up to you to decide which tool to work with. You can use FreeOpcUa’s Simple OPC UA GUI client, which is open source and available for all major OS’s. If you feel more comfortable working on the terminal, go for Etienne Rossignon’s opcua-commander. In case you prefer online tools, try One-Way Automation’s OPC UA Web Client. It is free to use, but you will be asked to sign up first and you will not be able to connect to servers on your local network.
About the Connectware OPC UA Server
Since the release of version 1.0.18, Connectware supports a new type of resource that can be utilized in services: The server resource enables services to run servers within Connectware and the first protocol supported by this resource is OPC UA. Thus, you can set up an OPC UA server, which can be used to receive data from or provide data to devices or applications mainly in industrial environments. Being fully integrated into Connectware, this feature allows to reduce the overheads in selecting, deploying, maintaining and integrating a separate software for fulfilling this demand in your system.
The OPC UA server is internally connected to the Connectwares protocol mapper, which means that you can map your data from any other protocol supported by the Connectware directly on data nodes of the OPC UA server. In the service commissioning file, OPC UA server nodes can be handled just as any other endpoint. Therefore, you can use them in mappings as usual by simply defining the data source and target.
Writing the Commissioning File
The Commissioning File contains all resource definitions and is read by Connectware. To understand the file’s anatomy in detail, please consult our Reference docs.
Start by opening a text editor and creating a new file, e.g. opcua-server-example-commissioning-file.yml. The commissioning file is in the YAML format, perfectly readable for both humans and machines! We will now go through the process of defining the required sections for this example.
Description and Metadata
These sections contain more general information about the commissioning file. You can give a short description and add a stack of metadata. As for metadata, only the name is required, while the rest is optional. We will use the following set of information for this lesson:
description: >

 OPC UA Server Example Commissioning File
 Cybus Learn - How to set up the integrated Connectware OPC UA server
 https://www.cybus.io/learn/how-to-set-up-the-integrated-connectware-opc-ua-server/

metadata:

 name: OPC UA Server Example Commissioning File
 version: 1.0.0
 icon: https://www.cybus.io/wp-content/uploads/2019/03/Cybus-logo-Claim-lang.svg
 provider: cybus
 homepage: https://www.cybus.io
Code-Sprache: YAML (yaml)
Resources
In the resources section we declare every resource that is needed for our application. The first necessary resource is the OPC UA server.
Cybus::Server::Opcua
resources:
 opcuaServer:
   type: Cybus::Server::Opcua
   properties:
     port: 4841
     resourcePath: /UA/CybusOpcuaServer
     alternateHostname: localhost
     applicationUri: 'urn:cybus:opcua:server:1'
     allowAnonymous: true
     securityPolicies: ["None", "Basic256Sha256"]
     securityModes: ["None", "SignAndEncrypt"]
Code-Sprache: YAML (yaml)
We create the OPC UA server by defining the type of the resource, namely Cybus::Server::Opcua. Then we define its properties: we set the port to 4841 to not get in conflict with other possibly present OPC UA servers. You can also set values for resourcePath and applicationUri, however in this case we proceed with the default ones. We have to set the alternateHostname to the own IP address of the Connectware host and we set allowAnonymous to true, so we can access the server without creating a user for this example. Note that this is not recommended for productive environments. With securityPolicies and securityModes we can define the options that should be supported by the server as an array.
Cybus::Node::Opcua
The next resources needed are the OPC UA server nodes. Let’s extend our list with some resources of the type Cybus::Node::Opcua.
1_root:
   type: Cybus::Node::Opcua
   properties:
     nodeType: Object
     parent: !ref opcuaServer
     nodeId: ns=1;s=1_root
     browseName: "root"

 1.1_DataNodes:
   type: Cybus::Node::Opcua
   properties:
     nodeType: Object
     parent: !ref 1_root
     nodeId: ns=1;s=1.1_DataNodes
     browseName: "DataNodes"
Code-Sprache: YAML (yaml)
The node resources of the OPC UA server build up a hierarchy of objects and variables. We create two levels of parent nodes here, which are of the nodeType Object. The first level is the root node. This has the server itself as a parent and we reference the server resource by using !ref opcuaServer. The second level then has the root as a parent, also defined by referencing. In this way, you can build up a hierarchy in which you can then create your variable nodes.
1.1.1_Boolean:
   type: Cybus::Node::Opcua
   properties:
     nodeType: Variable
     parent: !ref 1.1_DataNodes
     operation: serverProvides
     nodeId: ns=1;s=1.1.1_Boolean
     browseName: Boolean
     dataType: Boolean
     initialValue: false

 1.1.2_Int32:
   type: Cybus::Node::Opcua
   properties:
     nodeType: Variable
     parent: !ref 1.1_DataNodes
     operation: serverReceives
     nodeId: ns=1;s=1.1.2_Int32
     browseName: Int32
     dataType: Int32
     initialValue: 0

 1.1.3_String:
   type: Cybus::Node::Opcua
   properties:
     nodeType: Variable
     parent: !ref 1.1_DataNodes
     operation: serverProvidesAndReceives
     nodeId: ns=1;s=1.1.3_String
     browseName: String
     dataType: String
     initialValue: "intial"
Code-Sprache: YAML (yaml)
The variable nodes are of the type Cybus::Node::Opcua as well, but their nodeType is Variable. As a parent for our variables, we choose !ref 1.1_dataNodes. The operation which these nodes should serve can be of three types: serverProvides, serverReceives and serverProvidesAndReceives. serverProvides is a node which provides data and can be read by the OPC UA client. serverReceives is a node that receives data from an OPC UA client, while serverProvidesAndReceives nodes can be used in both ways. Furthermore, we choose a dataType for every variable and an initialValue which is the value present on the node after the server has started.
For all nodes in this section we defined a nodeId and a browseName, which can be used to address the nodes. The node ID must be unique on the server. The browse name can be used multiple times, but any browse path derived from it must be unique. However, explaining the OPC UA address space is certainly out of scope for this lesson. If you would like to learn more about the concepts of the OPC UA address space, then the Address Space Concepts documentation by Unified Automation will be a good place to start.
Cybus::Mapping
At this point we would already be able to read and write values to the OPC UA server utilizing OPC UA clients. However, to transfer data from devices or applications using other protocols to the OPC UA server, we have to create a mapping. This will allow us to forward data from any other protocol to be provided through the OPC UA server, or conversely, forward data received through the OPC UA server to any other protocol.
MqttMapping:
   type: Cybus::Mapping
   properties:
     mappings:
       - subscribe:
           topic: "opcua/provides/boolean"
         publish:
           endpoint: !ref 1.1.1_Boolean
       - subscribe:
           endpoint: !ref 1.1.2_Int32
         publish:
           topic: "opcua/receives/int32"
       - subscribe:
           endpoint: !ref 1.1.3_String
         publish:
           topic: "opcua/receives/string"
       - subscribe:
           topic: "opcua/provides/string"
         publish:
           endpoint: !ref 1.1.3_String
Code-Sprache: YAML (yaml)
In this case we want to provide the boolean values published on the MQTT topic opcua/provides/boolean, which will be provided on the OPC UA server node 1.1.1_Boolean. We will achieve this by referencing the node using !ref. Furthermore, we want the values received by the OPC UA node 1.1.2_Int32 to be published on MQTT topic opcua/receives/int32. To be able to use 1.1.3_String in both directions, we need to create two mappings: one to publish received values on opcua/receives/string and one to provide values published on opcua/provides/string to the OPC UA clients.
Instead of publishing or subscribing to MQTT topics, we could also reference endpoints on connections of other protocols in the same way as we do it for the OPC UA server nodes.
Installing the Commissioning File
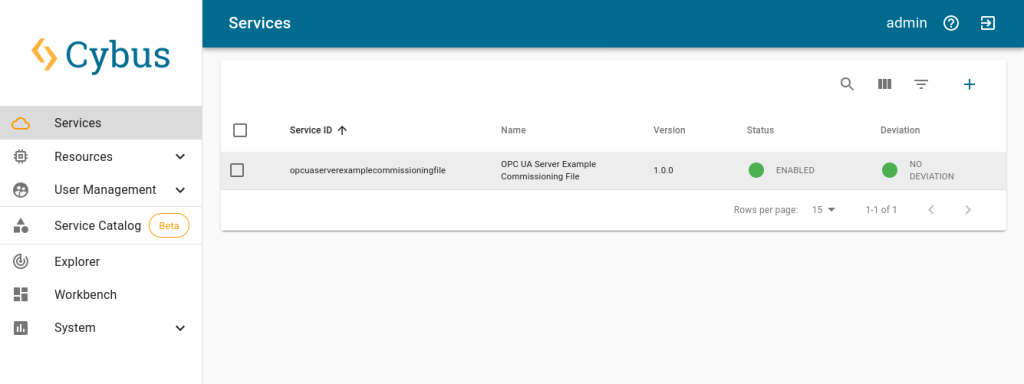
You now have the commissioning file ready for installation. Go to the Services tab in the Connectware Admin UI and click the (+) button to select and upload the commissioning file. After confirming this dialog, the service will be installed. On enabling the service, all the resources we just defined will be created: The OPC UA server, the server nodes and the mapping. Once the service has been successfully enabled, you can go ahead and see if everything works.
Verifying the Data
Now that our OPC UA server is running, we can go to the Explorer tab, where the tree structure of our newly created endpoints can be seen and the endpoints can be inspected. Hover over an entry and select the eye icon on the right – this activates the live view.

We can now use the OPC UA client to connect to our server on port 4841. Since we configured it to accept anonymous clients, we can just go ahead. If we wanted to allow access only to registered users, we would create them in the Connectware user management. But for now, after connecting to our OPC UA server anonymously, we can send data to the receiving variable nodes. In the Explorer view we can then see this data being published on the MQTT topics, on which we mapped the OPC UA variable nodes.
Additionally utilizing an MQTT client, we could now subscribe to this data or also publish data on the topic which is mapped on the providing variable nodes to send it to OPC UA clients. An easy way to experiment with these possibilities is the Workbench. There you can also easily configure MQTT nodes for quick prototyping. See our other articles to learn more about the Workbench.
Summary
Setting up an OPC UA server with a service commissioning file is quite simple. To adjust the server to suit your needs, the configuration with the commissioning file offers various additional options which are described in the Connectware Docs. Being integrated into Connectware, this OPC UA server can also be directly connected to the protocol mapper and through it to systems using other protocols.
Where to Go from Here
Connectware offers powerful features to build and deploy applications for gathering, filtering, forwarding, monitoring, displaying, buffering, and all kinds of processing data… why not build a dashboard, for instance? For guidance, read more on Cybus Learn.
Need more help?
Can’t find the answer you’re looking for?
Don’t worry, we’re here to help.